- File
-
Designs
-
-
All Categories -
Category #1 - New Category
-
My designs
-
-
Help
-
Welcome to At 10:36 Customs
Welcome to At 10:36 Customs.
Design your apparel in just a few steps:
Basic steps:
1. Choose your garment, size, color and quantity.
2. Upload your own artwork, logo, or design.
3. Resize and position your design within the printable area. This area is defined by the box over the garment preview.
4. Review your design carefully before adding it to your cart.
5. Depending on your device, the options toolbar will be on the left or the bottom of the screen
Your design will be printed as it appears in the designer, so take a moment to make sure everything looks the way you want it.
Click Images to upload artwork from your device. Supported image formats include PNG, JPG, JPEG, and SVG where applicable.
Once you have uploaded your design and it appears, click it and it will automatically be placed on the garment preview.
For best results:
High-resolution files work best for clean printing.
PNG files with transparent backgrounds are recommended for logos and graphics.
Avoid screenshots or blurry images, as they may print with reduced quality.
If your design looks blurry in the designer, the printed result may also appear blurry.
Select your design to move, resize, or rotate it.
Helpful tips:
Keep important artwork inside the printable area.
Leave a little space around the edges for the best appearance.
Use the Layers Tool (left toolbar) if multiple objects overlap within your design. Bringing items forward or sending them backwards, allows you to control if an object sits on the top/bottom of another object.
Small adjustments can make a big difference in how the final print looks.
Each side of the garment is customized independently.
Front Print – Choose this option to design the front of your garment.
Back Print – Choose this option to design the back of your garment.
Front & Back – To print on both sides of the garment, choose any of the options (Front Print/Back Print) and customize each side separately.
To switch between the front and back views of your garment, use the arrow controls located beside or beneath the garment preview, depending on your device. This allows you to view and customize each side independently before adding your design to your cart.
Powered by Lumise version 2.1.1
-
- Shop
- Undo
- Redo
- 0.0
-
My Cart
- Back To Shop
- Design
- Product
- Images
- Layers
Bug Reporting
Please let us know if you find any bugs on this design tool or just your opinion to improve the tool.
Tips: If you want to send content with screenshots or videos, you can upload them to imgur.com or any drive services and put links here.
-
Start designing by adding objects from the left side
- All selected objects are grouped | Ungroup?
- Group objects Group the position of selected objects
-
-
Fill options
Save this color
-
- Create QRCode
-
Options
-
Automatically align the position of <br>the active object with other objects -
ON: Keep all current objects and append the template into OFF: Clear all objects before installing the template -
Replace the selected image object instead of creating a new one
-
- Replace image
- Crop
-
Mask
-
Select mask layer
-
-
Remove background
-
Remove background
-
Deep:
-
Mode:
-
-
Filters
-
Filters
-
- Original
- B&W
- Satya
- Doris
- Sanna
- Vintage
- Gordon
- Carl
- Shaan
- Tonny
- Peter
- Greg
- Josh
- Karen
- Melissa
- Salomon
- Sophia
- Adrian
- Roxy
- Singe
- Borg
- Ventura
- Andy
- Vivid
- Purple
- Thresh
- Aqua
- Edge wood
- Aladin
- Amber
- Anne
- Doug
- Earl
- Kevin
- Polak
- Stan
-
Brightness:
-
Saturation:
-
Contrast:
-
- Clear Filters
- Click then drag the mouse to start drawing. Ctrl+Z = undo, Ctrl+Shift+Z = redo
- QRCode text
-
Fill options
-
Fill options
Save this color
-
Transparent:
-
Stroke width:
-
Stroke color:
-
- Ungroup position
-
Arrange layers
-
Position
-
Object position
Lock object position:
-
Center vertical
-
Top left
-
Top center
-
Top right
-
Center Horizontal
-
Middle left
-
Middle center
-
Middle right
- Press ← ↑ → ↓ to move 1 px, <br>Hit simultaneously SHIFT key to move 10px
-
Bottom left
-
Bottom center
-
Bottom right
-
-
Transforms
-
Rotate:
-
Skew X:
-
Skew Y:
-
Flip X:
Flip Y:
Free transform by press SHIFT+⤡
-
-
Font family
-
Edit text
-
Edit text
-
-
Font size:
-
Letter spacing
-
Line height
-
-
Text Effects
-
Text effects
-
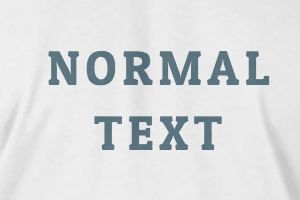
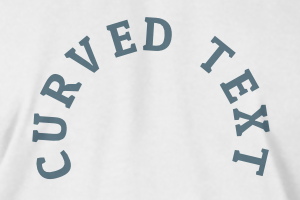
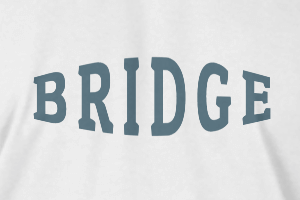
-
Radius
-
Spacing
-
Curve
-
Height
-
Offset
-
Trident
-
-
Text align
- Uppercase / Lowercase
- Font weight bold
- Text style italic
- Text underline